GOLD Translation ETL
This job takes a nmdc_merged_data.tsv.zip file as a data object input.
First, start your local runtime stack:
make up-dev
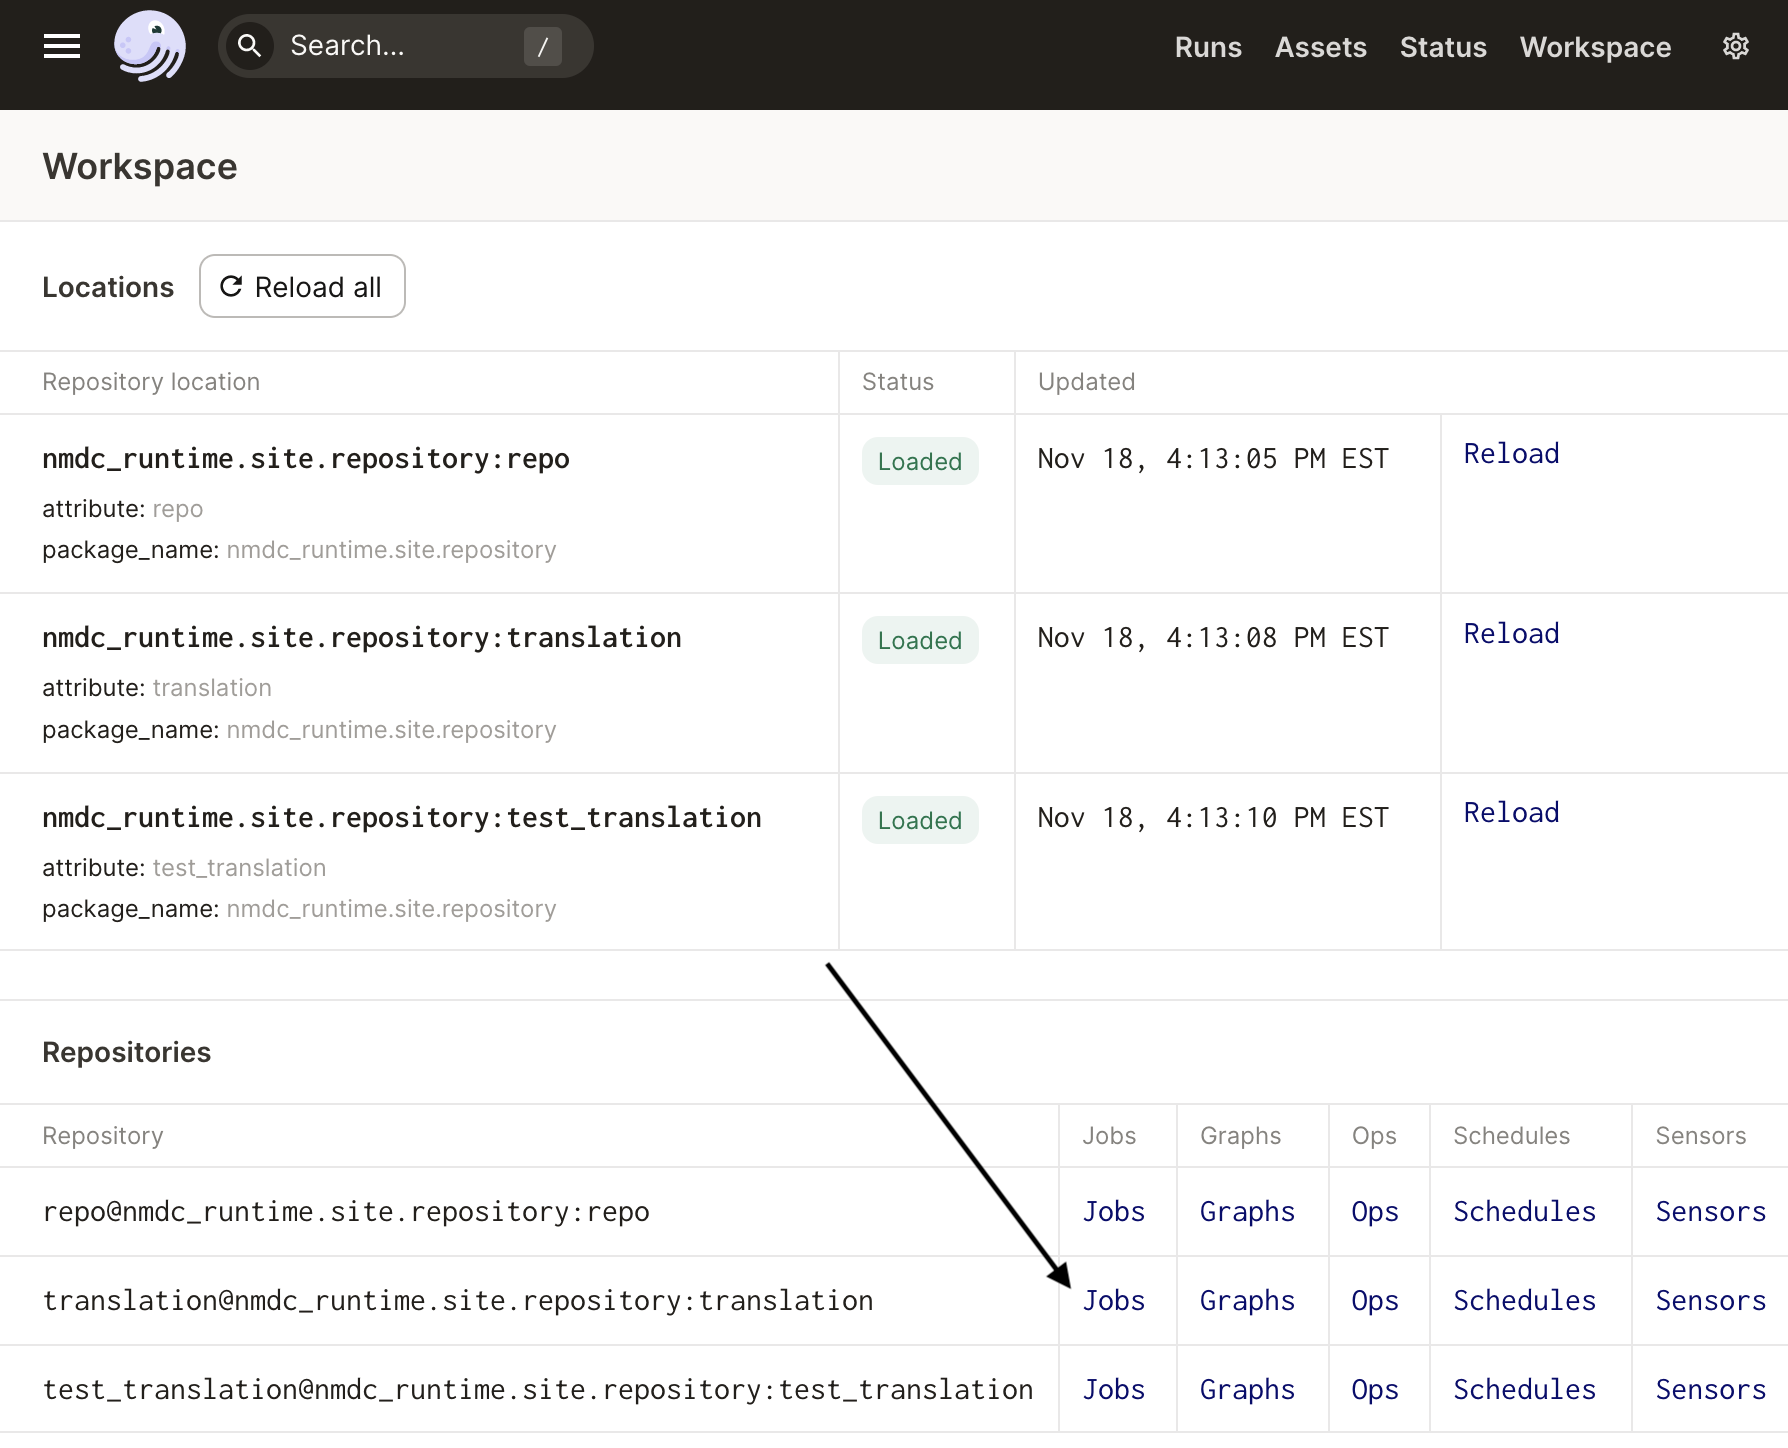
Load http://localhost:3000/workspace and ensure the translation repository is loaded:

Next, navigate to the Jobs page for the translation repository:
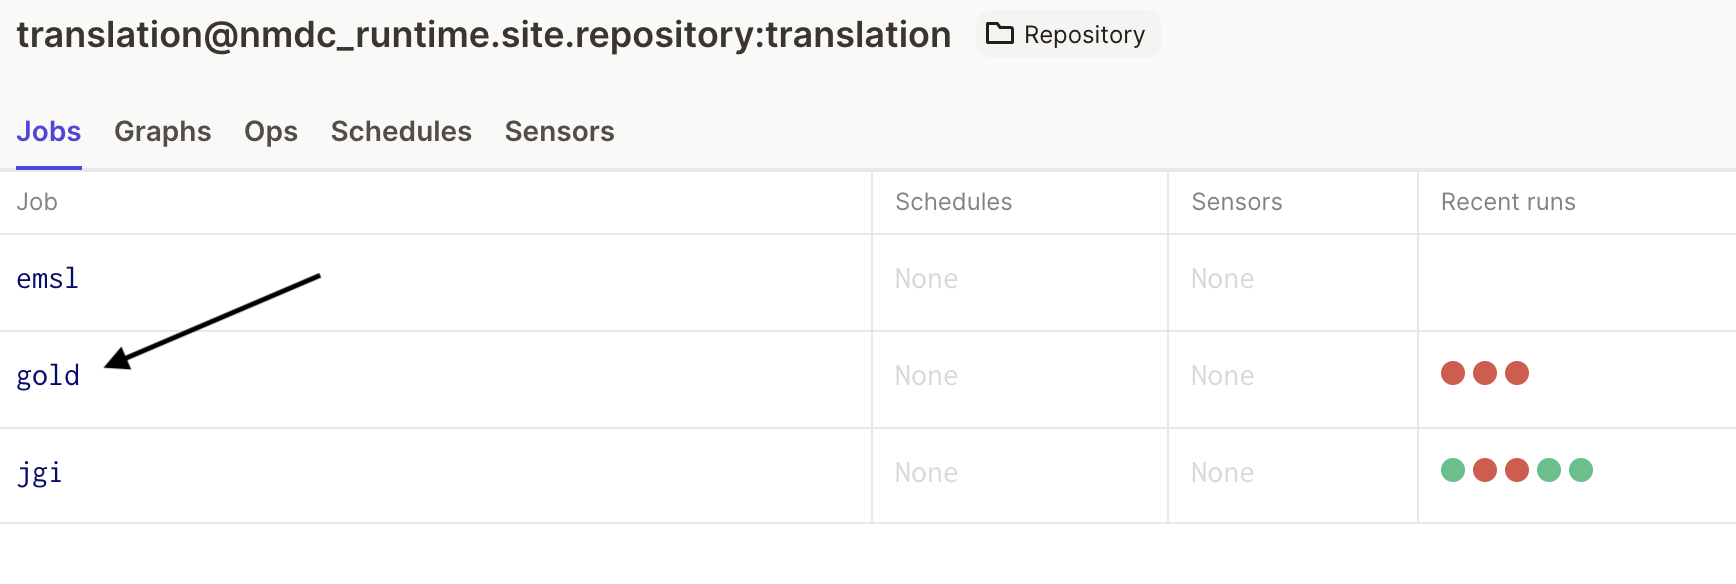
And finally, select the gold job from the table:
This will bring you to an overview of the job. Specifically, you will see the graph of
operations that the job uses, as well as information about the resources needed for the
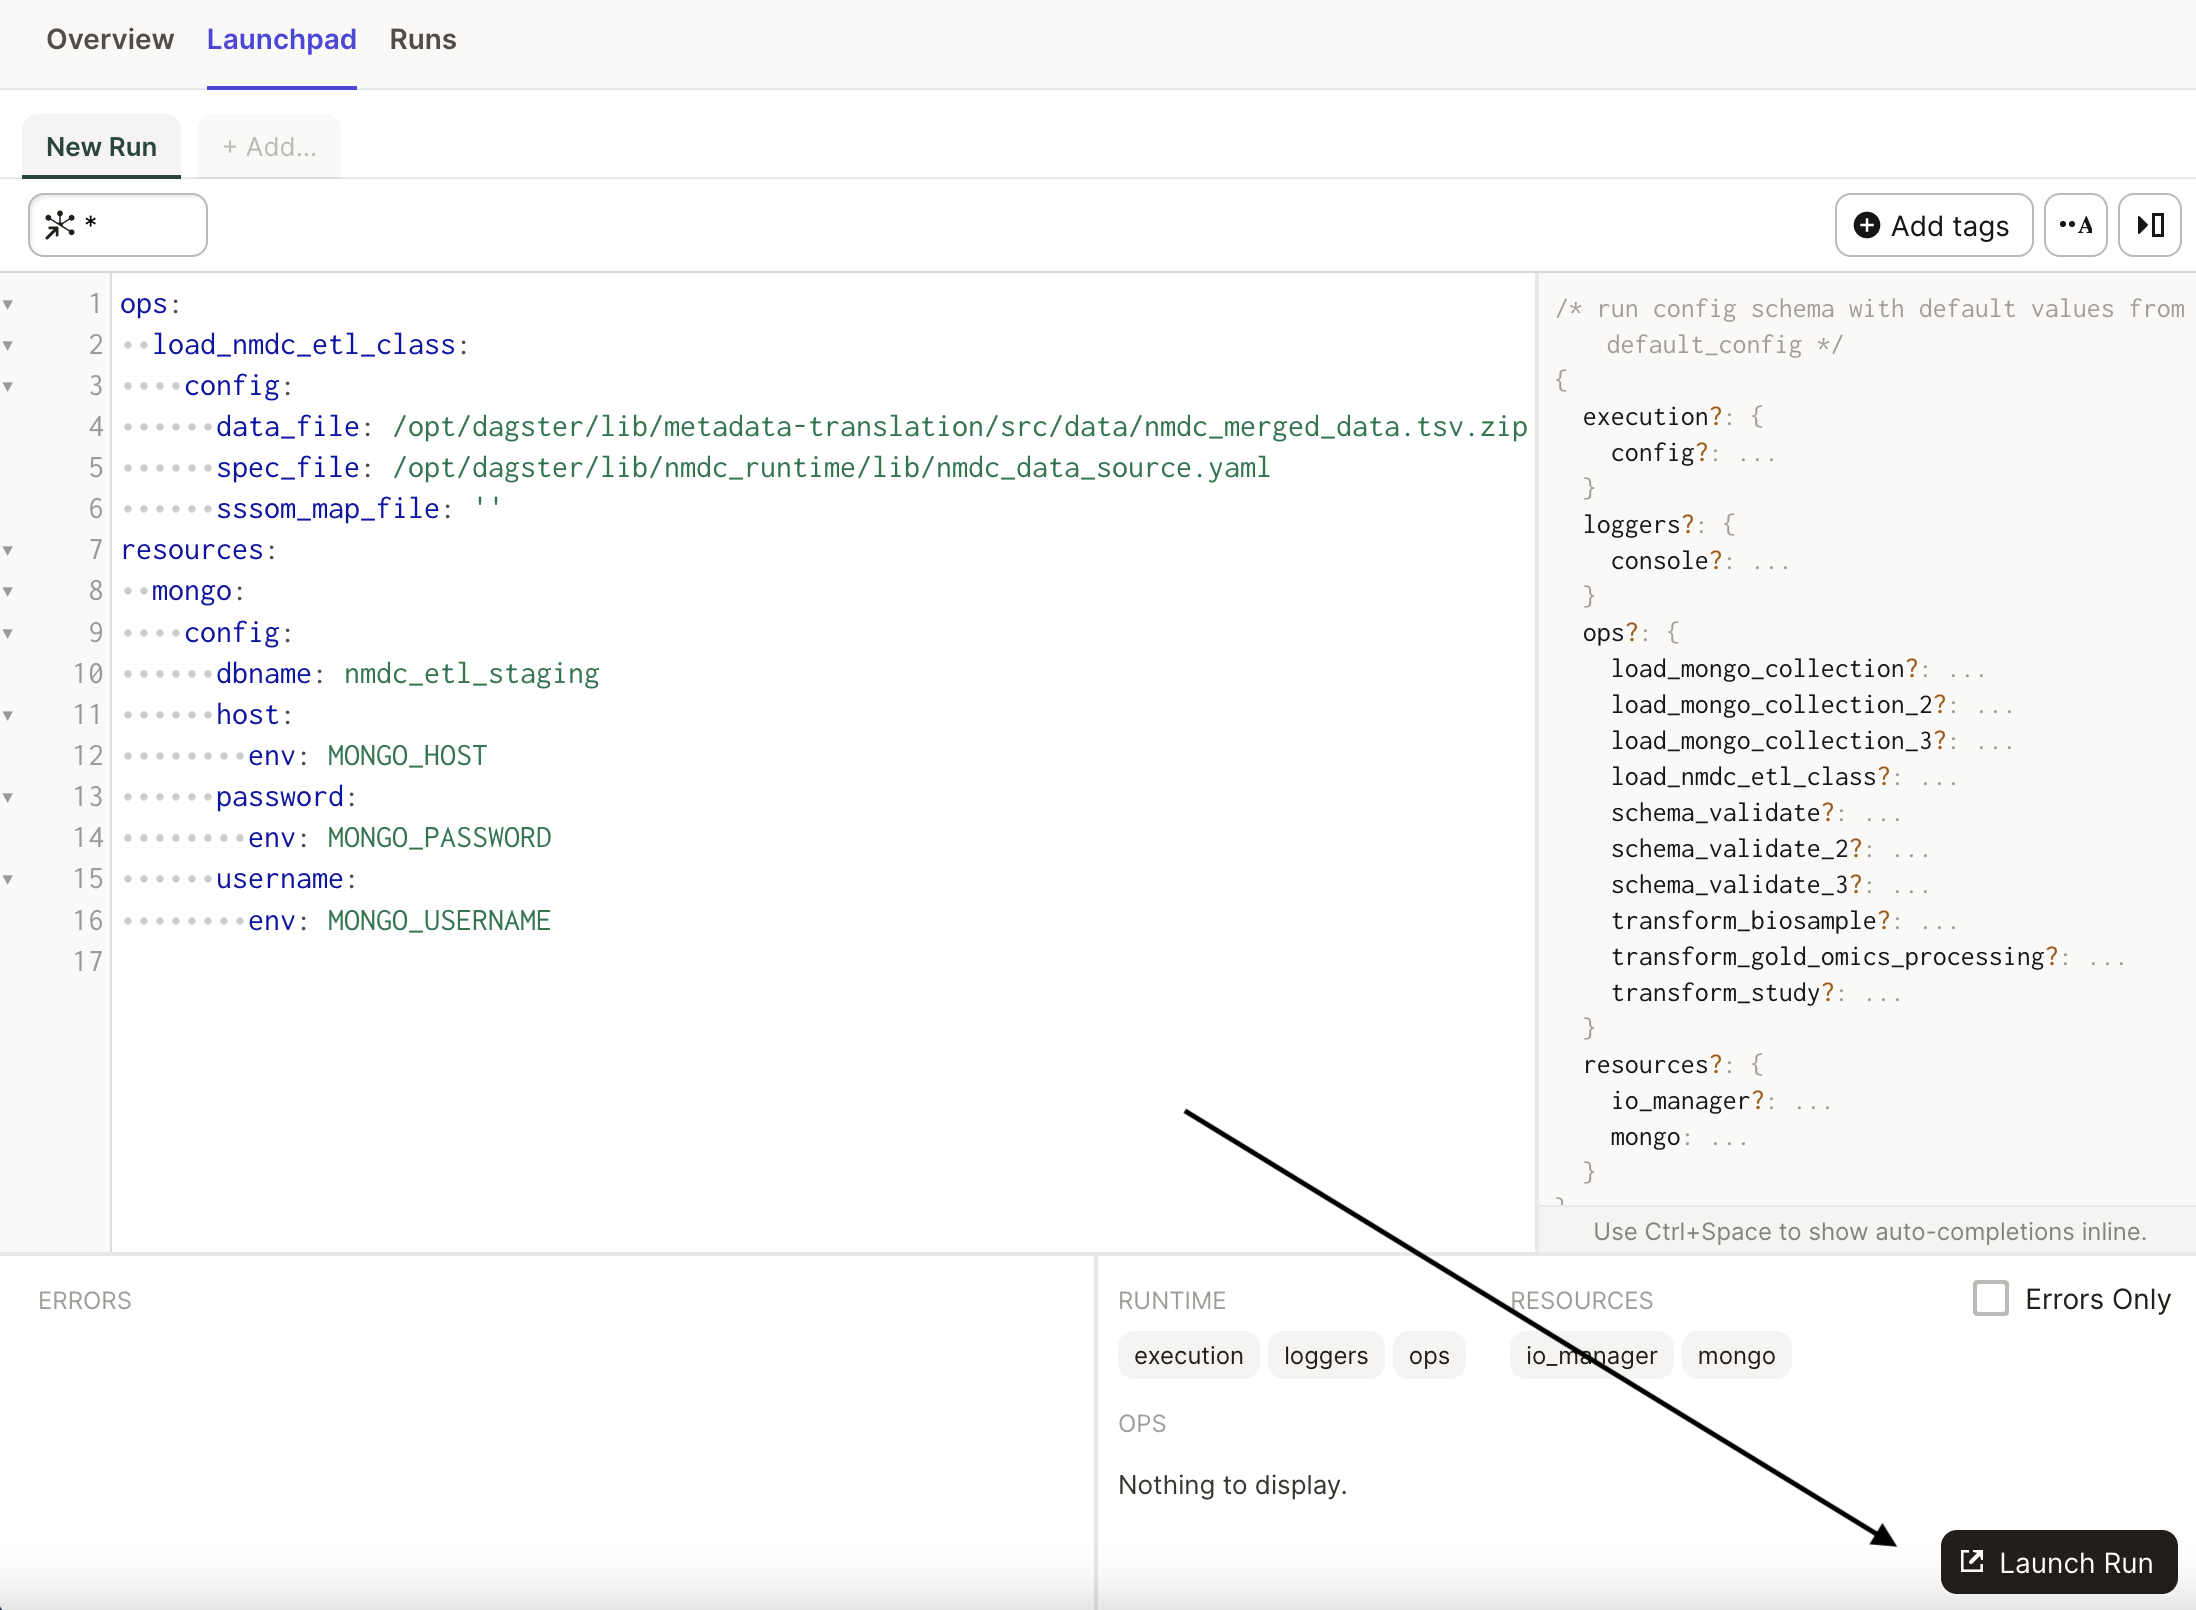
operations. Click on the Lauchpad tab to examine the job's configuration:

In the launchpad, we see the configuration for the job, which includes a reference to a
nmdc_merged_data.tsv.zip input file that was present in the nmdc-runtime git repository,
accessible via the /opt/dagster/lib/ path. We also see a button to launch a run of the job, i.e. a
run of the graph of operations configured with the YAML shown:
This job is being run manually. Other jobs in the Runtime system may be launched via Dagster
sensors that yield RunRequest(run_key=..., run_config=...) in the body of the sensor logic.
Sensors can periodically (e.g. every ~30 seconds) poll the system for any activation conditions,
such as the presence of new data objects of certain types. A sensor may then yield a RunRequest
for an appropriate job with e.g. the data object ID in the job configuration.
Once this translation ETL job finishes successfully, there will be new NMDC-schema-compliant
metadata in your local MongoDB instance (which was also started by make up-dev). One option now is
to export this metadata using the mongoexport command-line tool. Here's an example of exporting
the gold.biosample_set collection and conforming it to the nmdc:Database JSON schema using the
jq tool:
mongoexport --host="localhost:27018" \
    -u admin -p root --authenticationDatabase admin \
    -d nmdc_etl_staging -c gold.biosample_set \
    --jsonArray -o gold.biosample_set.json
jq '{biosample_set:.}' gold.biosample_set.json \
    > gold.biosample_set.as_nmdcdb.2021-11-18.json
Now, you may submit this metadata as JSON through the API.
In the tutorial linked to above, GitHub's Gist service is used to host and obtain a URL for the
JSON. Here's let's walk through using the NMDC's www directory on NERSC to host the file and
obtain the URL, as well as obtain the sha256 hash and file size in bytes we need in order to create
a DRS object in the API:
# Use https://docs.nersc.gov/connect/mfa/#sshproxy
scp  gold.biosample_set.as_nmdcdb.2021-11-18.json \
    dtn01.nersc.gov:/global/cfs/cdirs/m3408/www/meta/
ssh dtn01.nersc.gov

cd /global/cfs/cdirs/m3408/www/meta/

# ensure world-readable
chmod 444 gold.biosample_set.as_nmdcdb.2021-11-18.json

# get sha256 checksum
openssl dgst -sha256 gold.biosample_set.as_nmdcdb.2021-11-18.json

# get bytes
du --bytes gold.biosample_set.as_nmdcdb.2021-11-18.json
Now, you can use the normal procedure to register the object, ensure the "metadata-in" tag, and monitor the progress of the validation and ingest.